

Our girls were in desperate need of a new bedroom. We have lived in our new home for about a year, and their room looked a little like a spare room, it didn't have personality, the walls were rental beige, marked, and dirty. They had a bunkbed that they could never make the beds on, and it always looked a state. I wasn't pushing the room, though, as we have so much going on it was a headache to start thinking about another project, but....one day I happened upon two divan bunk-beds whilst browsing Gumtree (A UK site like craigslist). I knew we had to get them, they were a steal for £25 for the pair!
We have the girls every other weekend, and we picked up the beds 2 days before they arrived. I didn't want to just put new, lovely beds into an old dingy room, so I went the whole hog. Painting, redecorating.....I managed to get it all done in two days, working at first light, and late into the night in a manic frenzy.
I felt like I was on a home make over show!!
This is a very heavy post, lots of pictures, lots of chat - grab a cup of tea, and a biscuit!
 |
| Before. (See what I mean?) |
Once we got the beds home we realised why we had to throw our double divan when we moved in. We can't get anything up out stairs. Our stairs is through a doorway and then curves immediately to the right.
I refused to be beaten, or to admit failure, so I cut the beds in half!! I got them up, and then used pieces of 2x4 to put them back together, screwed along the two sections.

I wanted to do something a little different, something fun. The girls aren't pink/girlie girls, their favourite colours being yellows, blues, greens. So, I chose a bright, happy yellow for the main colour of the wall, as the sun lights up this room, and I wanted to amplify it. I then used a blue I had already, a pale-ish blue, by Annie Sloane. It isn't quite as dark as it looks in the picture.
I also re-painted ALL the walls white, including the ceiling. It instantly made the room look bright, light, and clean.

This photo is true to colour. I LOVE it! I was really tempted to paint clouds on the blue section. I'm thinking I might buy those cloud wall lights, instead!

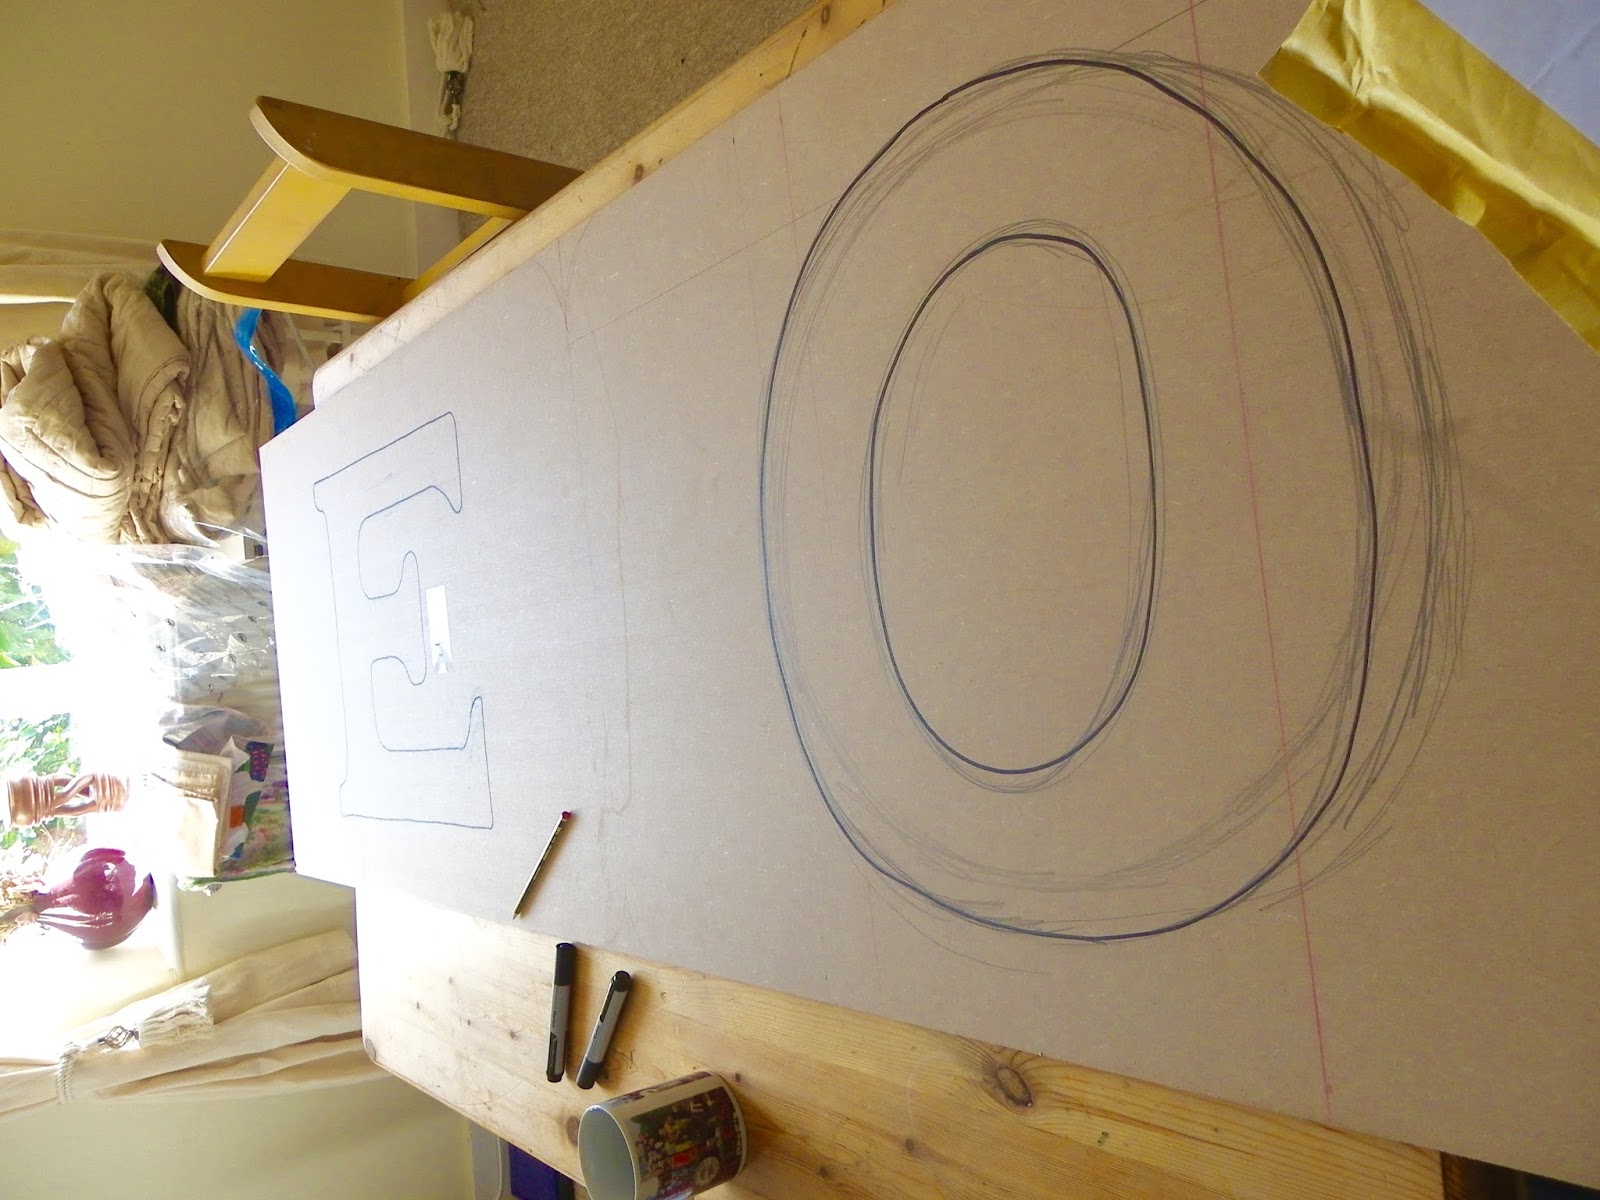
For the headboards, I wanted to make backlit monograms. I purchased a 6ft piece of MDF, And drew on their initials. Stephen cut them out with a jigsaw, and did an exceptional job! I was really nervous handing over a job - I'm a bit of a control freak, and I'm not quite sure how I would of handled it if he had messed it up!
But he didn't, and actually did a better job than I would of done.
I had painted the enclosing walls around the window yellow, I wasn't sure if I had gone too far, was it too much yellow? Whilst I stood looking at it, wondering, the sun rolled around, and rewarded me with this view. The universe saying 'Yep - good job'.

A quick look at how the walls looked with the wardrobe, (which you can read about here.) And whether the beds did fit in.

Back to the headboards. Once cut out, I rummaged around in the garden and found some light plyboard. I cut out two pieces to go behind the MDF, and left Stephen in charge of painting it. We gave the top a coat of chalkboard paint, so we can have a little fun with it later if we wished. (I had wanted to do a white line trim around the edges to make it 'pop', but the first attempt was terrible, and never got back round to doing it!)

When the ply-board was painted, we traced around the letter, and drilled 100 holes. I managed to find a drill bit that perfectly matched the size of the fairy lights. They are LED battery operated ones, with a flat light, and so worked perfectly for this project.
Once the holes were drilled, I just wedged the lights in, flush.

This is what it looks like from the back! It was quite an operation to get all the lights in, and not have any spaces due to the wire not being able to reach certain holes.


Since there was no room for bedside tables, I decided to make end tables. My Grandad always picks up old crates for me, so I had a few lying around spare. I also had old castors lying around from a wooden cabinet, and screwed them in.

Gave it a quick lick of paint, and a new lease of life!

Finished!

And in the dark - the girls are testing out the new super comfy beds!


 |
They will eventually go on the wall, either side the window, but for now we quite like them here!

The girls started collecting TY beanies - remember those!? So I built this shelf for them last year. It is old bed slats, painted and tied together. We have my old Beatles toys stood on the top shelf! (We love the Beatles in this home ;) )

Another shot of our letters.

Here you can see the other side of the room, there isn't much space, (It's a small cottage!) but it is snug, and suits us perfectly. I painted an old bookcase my Grandfather made when he was a child, and at some point we will line the back of it with fun paper. You can't see the side, but it has a yellow diagonal strip on the bottom half. I will do a little blog about it's makeover when it is all completed!)
The curtains will be changed - they are cute, but, I feel the room needs something less wishy-washy against all the white. Perhaps blue.....
Then there is their desk Stephen up cycled. It was a dark brown gloss desk, and he sanded the whole thing down and painted it this brilliant green. The drawer knobs are not back on yet, we're deciding on a colour!

Here you can see the bookcase a little better, and the TY Tower!

This is Eustace the Dragon, from those 'Dragonology' books.
 This looks kind of messy, and I almost didn't include it, but, I thought - It is a children's room, and these are children's things - I'm not going to pretend the room is perfect and immaculate, it's not, and nor is it meant to be.
These are a selection of random toys, craft supplies, shower/bath/hair pieces....


This is another shot of the room, in which George, our 'Gnot Garden Gnome' waves Hello.
 |
| We seem to have an unintentional 'Gnomey' Theme! |


Here you can see the other side of the room, there isn't much space, (It's a small cottage!) but it is snug, and suits us perfectly. I painted an old bookcase my Grandfather made when he was a child, and at some point we will line the back of it with fun paper. You can't see the side, but it has a yellow diagonal strip on the bottom half. I will do a little blog about it's makeover when it is all completed!)
The curtains will be changed - they are cute, but, I feel the room needs something less wishy-washy against all the white. Perhaps blue.....
Then there is their desk Stephen up cycled. It was a dark brown gloss desk, and he sanded the whole thing down and painted it this brilliant green. The drawer knobs are not back on yet, we're deciding on a colour!

Here you can see the bookcase a little better, and the TY Tower!

This is Eustace the Dragon, from those 'Dragonology' books.

These are a selection of random toys, craft supplies, shower/bath/hair pieces....


Here you can see the desk better. Any suggestions on a colour for the drawer knobs? They are just simple round ones.
The next few photos don't need much chatter, so I'll let you scroll though on your own....
Enjoy!


I hope you've enjoyed seeing the room, and it has inspired you in some way. I loved doing it, and I loved seeing the girls reaction. It made all the work worth it! They were speechless, and the eldest kept going up all weekend just to look at it again.
They now have a space that is 'theirs' in more way than one. Everything in there has been lovingly re-painted, re-puropsed, customised just for them by their Daddy and I. They love it, and love thinking of things to make the space grow. Planning gallery walls, Tie-Dye'd bedspread and valances, sewing bunting.
For me, it is a huge relief to have that space 'done'. I hated having to go in there before and see it - keeping the door closed so I could pretend it didn't exist!
Is there a room in your home your desperate to get your hands on, or are relieved to have finally conquered?
All you need is love,
The British Faery.
No comments:
Post a Comment
Leave me some Love!!